The University of Ohio Experimental Crop Station
Online Course Portal
Experimental Botany At Home
Welcome to the world of Experimental Botany! In this four-modual learning platform, participants are invited to transform their living spaces into personal laboratories where the wonders of plant biology come to life! This immersive, four-part course is designed to guide hobbyists, students, and plant enthusiasts through a series of hands-on experiments and activities that reveal the complexities and beauties of plant life. From the basics of seed germination under various conditions, constructing a DIY hydroponics system, the art of plant cloning through cuttings, to the science of extracting natural dyes and conducting chromatography, learners will gain practical skills and a deeper understanding of plant science. Each module combines detailed instructions with the scientific principles behind the experiments, encouraging participants to observe, record, and marvel at the results. This course not only aims to educate but also to inspire a greater appreciation for the natural world, fostering a sense of curiosity and wonder towards the botanical realm.
Module One: Germination Experiment with Variable Conditions
In this module, students embark on a fascinating journey to uncover the mysteries of seed germination, a foundational process in plant biology. This experiment invites participants to delve into the world of botany from the comfort of their own home, using common household items and seeds readily found in their kitchen. By manipulating variables such as light exposure, water levels, temperature settings, and soil types, students set up a series of controlled experiments to observe and document the effects of these conditions on the germination process. Whether placing seeds in dark closets to test germination without light or wrapping seeds in moist paper towels to explore the necessity of water, this activity is designed to spark curiosity and foster a hands-on understanding of plant life cycles.
Beyond the mere observation of sprouting seeds, this experiment serves as a primer in the scientific method, teaching students how to hypothesize, observe, and draw conclusions based on empirical data. It encourages critical thinking and analytical skills, as students must carefully consider how each variable might affect germination and why. For instance, they might predict that seeds in cooler temperatures will germinate more slowly than those in warm environments, then test their hypothesis against actual observations. As students record their findings, they not only learn about botany but also about the rigor and discipline of scientific experimentation. This activity not only cultivates a deeper appreciation for the complexities of plant biology but also instills a sense of wonder and inquiry about the natural world.
The Experiment
Objective: To understand how different environmental conditions affect the germination rate and success of common seeds.
Materials Needed
- Assorted seeds (beans, peas, or any quick-germinating seeds available)
- Clear plastic cups or small pots
- Potting soil
- Sand (optional)
- Paper towels
- Water
- Marker for labeling
- A notebook for observations
- A ruler for measuring growth
- Soak the seeds in water overnight to speed up germination.
- Prepare at least 3 seeds for each condition to ensure reliable results.
- Light vs. Darkness: Plant seeds in two cups. Place one in a sunny spot and the other in a dark cupboard.
- Water Levels: Plant seeds in two cups. Water one cup normally and the other with either more or less water than recommended.
- Temperature: Place seeds in cups in areas with different temperatures, one in a warmer area and another in a cooler one.
- Soil Type: Plant seeds in different types of media: one in potting soil and the other in sand (or a mix of both).
- Record the number of days taken for each seed to germinate under different conditions.
- Note the differences in growth rates, health, and vigor of the seedlings.
- Consider why some seeds performed better than others and how each variable might affect germination and early growth.
Experiment Setup
Labeling: Label your cups or pots according to the variable conditions you will test: Light vs. Darkness, Different Water Levels, Temperature Variations, and Soil Type.
Preparing the Seeds
Setting Up Variable Conditions
Daily Observations
Check your seeds daily for signs of germination. Note any changes in the seeds, such as swelling or the emergence of the radicle (root).
Moisture and Care
Ensure that the soil or paper towels remain moist but not waterlogged. Adjust the care according to the setup needs.
Growth Measurement
Once seeds have germinated and sprouted, use a ruler to measure the growth of seedlings every other day.
Analysis
Conclusion
At the end of the experiment, compare the growth outcomes across the different conditions. Analyze which conditions were most and least favorable for seed germination and seedling development. Discuss your findings in relation to what is known about plant growth requirements, and hypothesize about the reasons for any unexpected results.
This hands-on experiment not only provides insight into how environmental factors influence plant growth but also introduces the scientific method through observation, experimentation, and analysis.
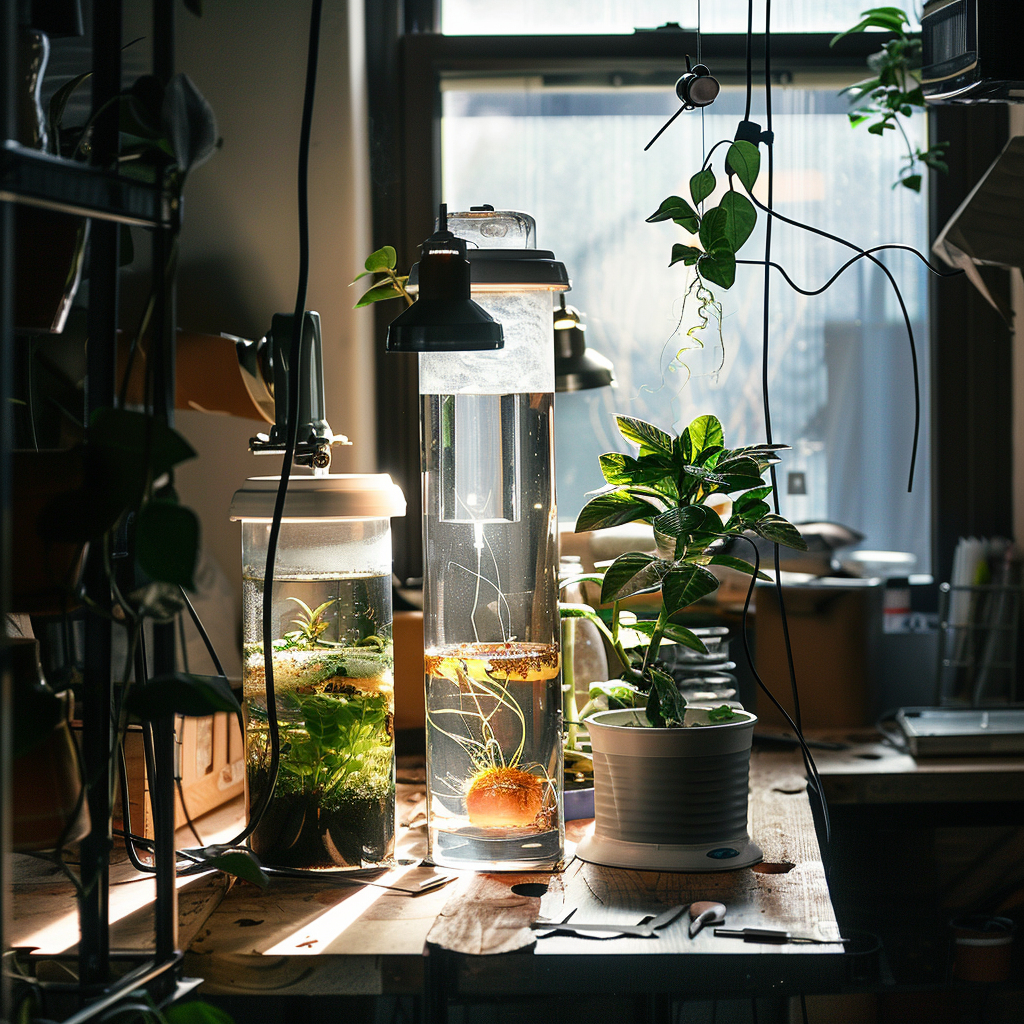
Module Two: DIY Hydroponics System
In the "DIY Hydroponics System" activity, students are introduced to the innovative world of soilless gardening, a method that allows plants to grow faster, with less water and space than traditional gardening. This hands-on project demystifies hydroponics by guiding participants through building their own miniature hydroponic system using simple, recycled materials. By utilizing plastic bottles, cotton wicks, and a homemade nutrient solution, students create a sustainable environment for plants to thrive, offering a firsthand look at the principles of hydroponics. This activity not only teaches the importance of nutrients and water in plant growth but also highlights the potential for sustainable and efficient farming techniques in urban settings or areas with limited agricultural land.
As participants set up their DIY hydroponic systems, they engage with key scientific concepts, including capillary action, nutrient uptake, and the role of light in plant growth. They observe the growth of their plants over time, noting the absence of soil and how water mixed with nutrients directly affects plant health and growth rate. This experiment serves as a practical application of ecology and environmental science principles, encouraging students to think critically about agricultural sustainability and food production. It also offers a platform for discussing broader topics, such as the impact of traditional farming on the environment and the potential of hydroponics to reduce water usage, minimize land use, and even combat food insecurity. Through this activity, students gain not only a deeper understanding of plant biology and the science behind hydroponics but also an appreciation for innovative solutions to global challenges.
The Activity
This activity guides you through creating your own simple hydroponic system at home using easily available materials. It’s a fantastic way to understand the basics of hydroponics and the importance of water, nutrients, and light in plant growth.
Objective: To build a simple hydroponic system and observe the growth of a plant without soil.
Materials Needed
- 1-2 liter plastic bottle(s)
- Cotton wicks or strips of an old cotton T-shirt
- Perlite, vermiculite, or hydroton balls (optional)
- Nutrient solution (can be purchased or homemade)
- Seeds (lettuce, herbs, or any leafy green work well)
- Knife or scissors
- Water
Instructions
Prepare the Bottle: Cut the top third off a 1-2 liter plastic bottle. Invert the top and place it into the bottom half so that it functions as a holder for the plant and growing medium.
Wicking System: Thread a cotton wick through the bottle cap hole, ensuring it’s long enough to reach the bottom of the bottle and hang out about 2-3 inches above. This wick will draw water up to the plant roots.
Adding Growing Medium: Fill the inverted top portion of the bottle with a lightweight growing medium like perlite or vermiculite. This will support the plant roots and retain moisture. (If using hydroton balls, rinse them before use.)
Planting Seeds: Plant a few seeds in the growing medium, following the depth and spacing guidelines on the seed packet. Alternatively, you can start with a small seedling.
Nutrient Solution: Mix the nutrient solution according to package instructions. If you’re using a homemade solution, ensure it’s suitable for the type of plants you’re growing. Fill the bottom half of the bottle with this solution.
Assembly: Place the top part with the plant back into the bottom half so the wick is submerged in the nutrient solution. Make sure the growing medium is moist but not waterlogged.
Lighting: Place your hydroponic system in a well-lit area or under a grow light to ensure your plant receives adequate light.
Maintenance: Check the water level daily and refill as necessary to keep the wick moist. Monitor plant growth, and add more nutrient solution every two weeks or as needed.
Observations and Notes
- Record the growth of your plant, noting changes in height, leaf development, and overall health.
- Pay attention to any signs of nutrient deficiencies or excesses and adjust your nutrient solution as needed.
- Document your observations on how the hydroponic system compares to traditional soil growing if possible.
Conclusion
This activity provides a hands-on experience with hydroponics, illustrating the efficiency and sustainability of soilless agriculture. By observing the growth of your plant in this DIY system, you gain insight into the essential requirements for plant health and the potential for innovative farming techniques.
Module Three: Plant Cloning through Cuttings
The "Plant Cloning through Cuttings" activity immerses participants in the fascinating process of asexual reproduction in plants, demonstrating how new, genetically identical plants can be propagated from the cuttings of a parent plant. This hands-on experiment not only offers a practical application of botanical concepts but also introduces an accessible method of plant multiplication that can be easily performed at home. Using common household plants such as basil, mint, or any other readily available herb, participants learn to carefully select, cut, and nurture plant cuttings until they develop roots and become viable plants on their own. This activity highlights the efficiency and sustainability of vegetative propagation, showcasing how cuttings can lead to the rapid expansion of plant collections without the need for seeds and with minimal waste.
Beyond the practical gardening skills acquired, "Plant Cloning through Cuttings" provides a deep dive into the principles of plant biology, genetics, and ecology. Participants observe firsthand the remarkable adaptability and resilience of plants, gaining insights into the mechanisms that allow plants to spread and occupy space efficiently in nature. The experiment also sparks discussions on the significance of genetic diversity and the role of asexual reproduction in both natural ecosystems and agricultural practices. As participants monitor the progress of their cuttings, they not only witness the stages of root development and growth but also engage with broader scientific concepts, making this activity a bridge between everyday gardening practices and complex biological theories.
The Activity
This step-by-step guide will show you how to clone plants using cuttings, an easy and efficient way to propagate your favorite plants at home.
Objective: To learn how to propagate plants asexually by cloning them from cuttings, producing new plants that are genetically identical to the parent plant.
Materials Needed
- A healthy parent plant (herbs like basil, mint, or rosemary are great choices)
- Sharp scissors or pruning shears
- Small pots or cups
- Potting soil or a water container
- Rooting hormone powder or gel (optional)
- Plastic bags or plastic wrap (optional for creating a greenhouse effect)
- A pencil or small stick
Instructions
Selecting Cuttings: Choose healthy, non-flowering stems from the parent plant. Look for new growth that is green and flexible.
Preparing Cuttings: With clean scissors or shears, cut a 4-6 inch piece from each selected stem. Make the cut just below a leaf node (the point where leaves emerge from the stem). Remove the leaves from the lower half of the cutting to prevent decay and focus the plant's energy on root development.
Rooting Medium Preparation:
- For Soil: Fill small pots or cups with moist potting soil. Use a pencil to make a hole in the center of the soil for each cutting.
- For Water: Fill a small container with water to submerge the bottom half of the cuttings. Change the water every few days to keep it fresh.
Planting Cuttings: Dip the cut end of each stem into rooting hormone powder or gel if you’re using it. This step is optional but can help stimulate root growth.
- For Soil: Place the cutting into the hole made in the soil, gently firming the soil around the stem to hold it in place.
- For Water: Place the cutting into the water container, ensuring no leaves are submerged.
Creating a Humid Environment For Soil: Cover the pot with a plastic bag or wrap to create a greenhouse-like environment that retains humidity, which encourages root growth. Make sure the plastic does not touch the leaves by using sticks to support it.
Caring for Cuttings
Place the cuttings in a warm, bright area but out of direct sunlight. If in soil, keep the soil consistently moist but not waterlogged.
For water propagation, ensure the water level is maintained and fresh.
Observing Root Development
Check for root growth after 2-4 weeks. For soil cuttings, gently pull on the plant; if there's resistance, roots have formed.
For water-grown cuttings, you should see roots developing visibly. Once roots are a few inches long, they can be transplanted into soil.
Transplanting
Carefully transplant rooted cuttings into individual pots filled with potting soil, taking care not to damage the delicate roots.
Conclusion
Through this activity, you’ve learned how to clone plants using cuttings, a simple yet effective method of plant propagation. This process not only demonstrates the principles of asexual reproduction in plants but also allows you to efficiently expand your plant collection. As you monitor the growth and development of your new plants, you'll gain a deeper appreciation for the wonders of plant biology and the potential for sustainable gardening practices.
Module Four: Natural Dye Extraction and Chromatography
The "Natural Dye Extraction and Chromatography" activity offers a creative and insightful exploration into the chemistry of plants and their colors, blending art with science in a captivating experiment. Participants embark on a journey to extract natural dyes from various plant materials found in their homes or gardens, such as the vibrant petals of flowers, the skins of onions, or the leaves of spinach, to discover the spectrum of pigments present in nature. This process not only unveils the hidden hues within plants but also serves as an introduction to the concept of chromatography, a method used to separate mixtures into their individual components. By applying the extracted dyes onto strips of paper and observing the separation of colors as they're drawn up by a solvent, participants gain firsthand experience in how chromatography is used to analyze the composition of substances, offering a window into the techniques used in both research and industry for identifying and separating chemical compounds.
Beyond its scientific value, this activity fosters an appreciation for the beauty and complexity of natural pigments, encouraging a sustainable approach to art by utilizing eco-friendly materials. As the colors spread and separate on the chromatography paper, creating unique patterns and gradients, participants witness the intersection of science and art, where each strip becomes a piece of natural artwork. This experiment not only educates on the principles of plant biology and chemistry but also inspires creativity and curiosity about the natural world and its applications in sustainable living. It highlights the potential for using natural dyes in various industries, from textiles to cosmetics, promoting an environmentally conscious perspective on resources and their uses. Through "Natural Dye Extraction and Chromatography," participants are not just conducting a scientific experiment; they are engaging in a broader conversation about conservation, sustainability, and the innovative ways we can harness the beauty and utility of nature in our everyday lives.
The Activity
This activity guides you through the process of extracting natural dyes from plants and using simple paper chromatography to reveal the different pigments present in your extracts.
Objective: To extract natural dyes from various plant materials and explore the principles of chromatography by separating the pigments on paper.
Materials Needed
- Fresh or dried plant material (flowers, leaves, vegetable skins)
- Mortar and pestle or a blender
- Small bowls or cups
- Filter paper (coffee filters or chromatography paper)
- Ethanol or rubbing alcohol
- Tall glasses or jars
- Pencils or sticks
- Water
- Scissors
- Pipette or spoon
Instructions
Dye Extraction
- Chop or tear your plant material into small pieces to increase the surface area for extraction.
- Place the plant material in a mortar and grind it with a pestle, or blend it, adding a small amount of water to help extract the pigments. If using dry materials like onion skins, boiling them in water for 10-15 minutes can also extract the dye.
- Filter the resulting mixture through a coffee filter or a fine mesh to collect the liquid dye in a bowl or cup. This is your natural dye extract.
Preparing the Chromatography Paper
- Cut the filter paper into long strips, about 2 inches wide.
- Near the bottom of each strip (leave about an inch from the edge), use a pipette or a spoon to place a small drop of the dye extract. Let it dry.
Setting Up the Chromatography
- Fill a glass or jar with a small amount of ethanol or rubbing alcohol, just enough to cover the bottom.
- Tape the top of the paper strip to a pencil or stick and place it inside the glass so that the bottom of the strip touches the solvent. The dye spot should not be submerged.
- The solvent will travel up the paper, carrying the pigments with it.
Observing Chromatography
- Watch as the solvent moves up the paper, separating the pigments in the dye as it goes. Different pigments will move at different rates, creating a spectrum of colors on the paper.
- Once the solvent has nearly reached the top of the paper, remove the strip and let it dry.
Analysis
Observe and note the different colors that have separated on the chromatography paper. Each band of color represents a different pigment extracted from the plant material.
Discuss what the separation of colors tells us about the complexity of natural dyes and the variety of pigments present in a single type of plant material.
Conclusion
Through this activity, you've learned how to extract natural dyes from plants and separate the pigments using paper chromatography. This not only demonstrates a key technique used in chemical analysis but also reveals the diversity of colors hidden within natural materials. By exploring the science behind natural dyes and chromatography, you gain a deeper appreciation for the beauty of plant pigments and their potential applications in art, science, and sustainability.